Quickstart
Welcome to Speed Build Marketplace! This guide will help you set up your development environment quickly and efficiently. We'll cover the steps to install necessary dependencies, configure your .env file, and start your development server.
Before proceeding, ensure you have Node.js version 18.17 or higher installed
on your machine. You can check your version by running node -v in your
terminal.
NextJS project structure
- /app → Pages (1 folder + page.js = 1 page)
- /app/api → API calls (1 file = 1 API route endpoint)
- /components → React components
- /libs → Libraries helper functions (Stripe & Sendgrid, auth etc.)
- /models → Database models
config.js file
The config.js file is crucial for setting up and customizing your application. Each configuration key is thoroughly documented to explain its purpose and usage. Be sure to review this file carefully, as it serves as the backbone of the app.
1. Project Setup
Clone the Repository
To begin, clone the Speed Build Marketplace repository to your local machine:
Terminal
git clone https://github.com/razz1000/speed-build-marketplace.git [YOUR_APP_NAME]
cd [YOUR_APP_NAME]
npm install
git remote remove origin
npm run dev
2. Configure Environment Variables
Rename the Environment File
Rename the .env.example file to .env and populate it with your configuration values:
Terminal
mv .env.example .env
3. Edit the .env.local File
Open .env and fill in the placeholders:
.env
NEXT_PUBLIC_CLERK_PUBLISHABLE_KEY=your_clerk_publishable_key
CLERK_SECRET_KEY=your_clerk_secret_key
NEXT_PUBLIC_API_BASE_URL=http://localhost:3000
STRIPE_PUBLISHABLE_KEY=your_stripe_publishable_key
STRIPE_SECRET_KEY=your_stripe_secret_key
MONGODB_URI=
NEXT_PUBLIC_GTM_ID=GTM-XXXXXX
Clerk for auth
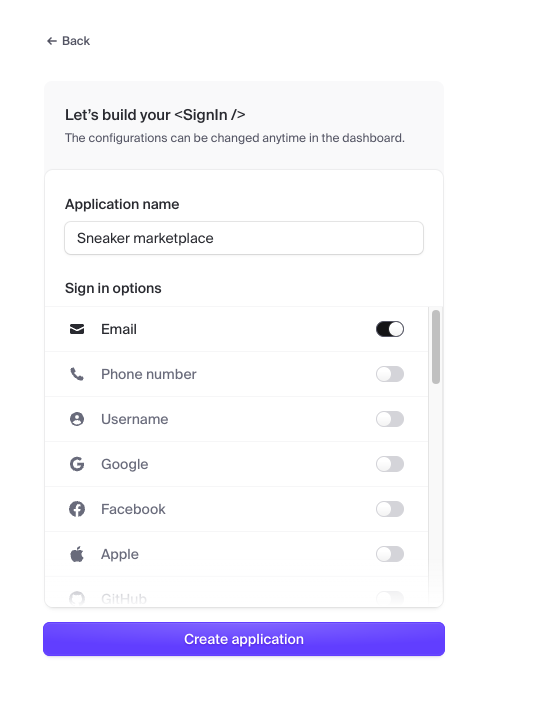
We use Clerk for authentication, because it is super fast to set up, and because they have a good free plan. So, go to Clerk.com. and click on Sign up. Then enter your email and add the name of your marketplace as seen below :
Then go to "API keys" and copy the keys over to your .env file as seen below:

And then go to "User & Authentication > Email, Phone, Username and just select "Email address" and "Email verification code" for now, as seen in the below image, which means that all users will be sent a login code when they sign in - so that they do not have to remember a password.
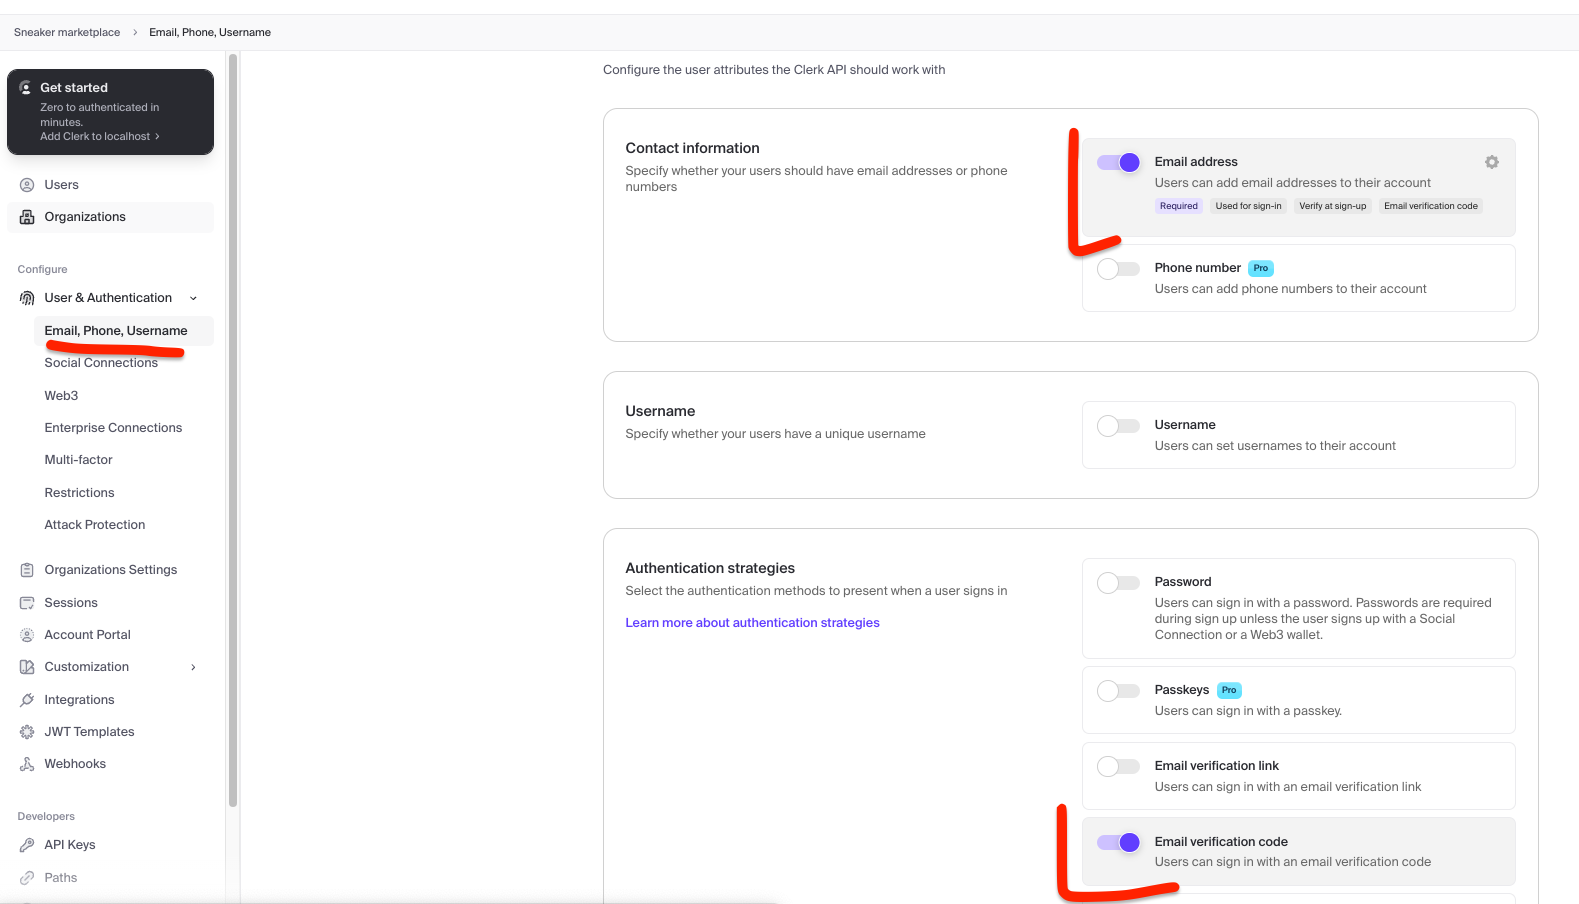
You can add social-logins later, which is explained in the Features section of this documentation.
4. Open localhost
Open http://localhost:3000 to see your marketplace site running in the local environment. Currently, the data you see is fake data from the app/exampleData folder.
5. Replace fake data with real data from MongoDB
Now that we know that everything works with fake data - let's connect MongoDB so that we can start using real data.
-
Set Up Your MongoDB Connection:
-
Add your MongoDB connection string to the
.envfile:.env
MONGODB_URI=your_mongodb_connection_string
-
-
Update API Endpoints:
- Navigate to the
app/apifolder. This is where all your API routes are defined. - Replace the hardcoded fake data calls with actual calls to MongoDB using Mongoose. For example, update your
GETrequests to fetch data from MongoDB collections.
- Navigate to the
-
Restart Your Server:
- After updating the API routes, restart your development server:
Terminal
npm run dev - Your application should now be fetching data from MongoDB instead of the fake data.
- After updating the API routes, restart your development server:
Example
Here's a quick example of how to update an API endpoint:
Before (using fake data):
// /app/api/get-all-messages/route.js

import { NextResponse } from 'next/server'
import messages from '../../data/messages'

export async function GET() {
  return NextResponse.json(messages, { status: 200 })
}

//Uncomment the below code after you have added your MONGODB_URI= in .env file.
// import { NextResponse } from "next/server";
// import connectMongo from "../../../../libs/connectMongo";
// import Message from "../../../../models/message";

// export async function GET() {
//   try {
//     // Connect to MongoDB
//     await connectMongo();

//     // Fetch all messages
//     const messages = await Message.find();

//     // Return messages in JSON format with status 200
//     return NextResponse.json(messages, { status: 200 });
//   } catch (error) {
//     console.error("Error fetching messages:", error);
//     // Return error message in JSON format with status 500
//     return NextResponse.json(
//       { error: "Internal Server Error" },
//       { status: 500 }
//     );
//   }
// }
After (fetching data from MongoDB):
// /app/api/get-all-messages/route.js

// import { NextResponse } from "next/server";
// import messages from "../../data/messages";

// export async function GET() {
//   return NextResponse.json(messages, { status: 200 });
// }

//Uncomment the below code after you have added your MONGODB_URI= in .env file.
import { NextResponse } from 'next/server'
import connectMongo from '../../../../libs/connectMongo'
import Message from '../../../../models/message'

export async function GET() {
  try {
    // Connect to MongoDB
    await connectMongo()

    // Fetch all messages
    const messages = await Message.find()

    // Return messages in JSON format with status 200
    return NextResponse.json(messages, { status: 200 })
  } catch (error) {
    console.error('Error fetching messages:', error)
    // Return error message in JSON format with status 500
    return NextResponse.json(
      { error: 'Internal Server Error' },
      { status: 500 },
    )
  }
}
Understanding API Routes in Next.js 14
In Next.js 14, API routes act as serverless functions that allow you to create endpoints to interact with your database or other backend services. When you fetch data from these API routes, they communicate with your MongoDB database and return the data to your frontend application. This ensures a clear separation of concerns and makes your application more maintainable.
6. Add Webhook in Clerk to Sync User Data to MongoDB
When a new user is created, we need to ensure that the user is also created in the MongoDB database. This is achieved by setting up a webhook in Clerk. You can refer to the official documentation here.
Follow these steps to set up the webhook:
-
Go to Webhooks in Clerk:
- Navigate to the Webhooks area within the Clerk dashboard.
- Click on "Add endpoint."
-
Subscribe to Events:
- Under "Subscribe to events," check the box for "user.created."
-
Install Localtunnel:
- Open a second terminal window and run the following command to install Localtunnel globally:
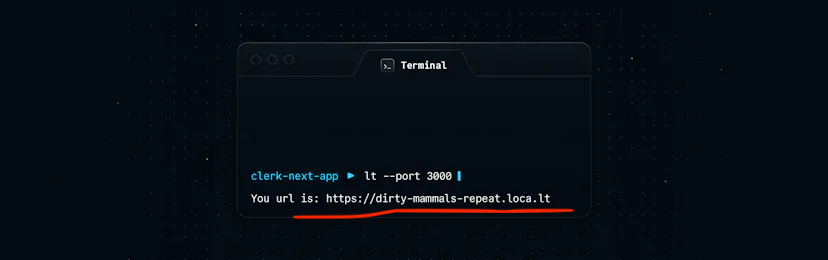
npm install -g localtunnel - Start Localtunnel by running:
lt --port 3000 - You will receive a URL back. Copy this URL.
- Open a second terminal window and run the following command to install Localtunnel globally:
-
Set Up the Endpoint URL:
- In the Clerk dashboard, paste the copied URL into the "Endpoint URL" field.
- Append
/api/webhooks/create-user/to the end of the URL. So in this instance the full url would behttps://dirty-mammels-repeat.loca.lt/api/webhooks/create-user/
-
Create the Webhook:
- Click the "Create" button to set up the webhook.
Now, the webhook for creating a new user is set up. If you go to http://localhost:3000/ and sign up with a new user, the user will be created both in Clerk and in your MongoDB environment. Voila!
7. Basics ready
Great! You now have the basic setup ready. You will still need to create the create-listing endpoint and any other endpoints according to your idea and logic. However, the foundational setup is complete, and you are ready to build on top of it.
You just saved a lot of time. 🎉🎉🎉🥳🥳🥳
Continue building your endpoints and enhancing your application based on your requirements.
Happy coding!